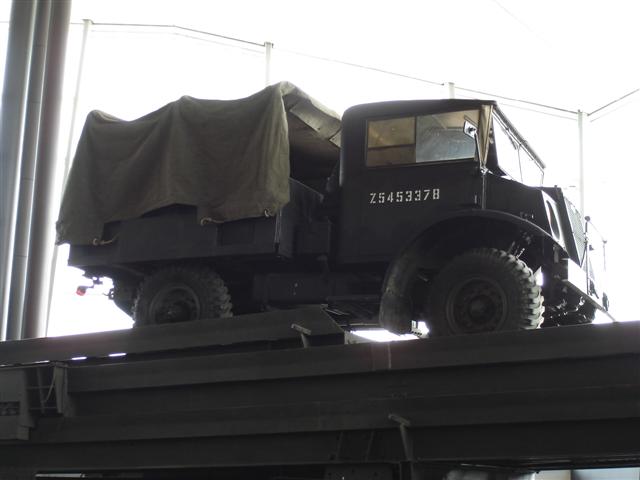
Welcome to the website where you can find information on military vehicles used by the Canadian Military in the post-war years.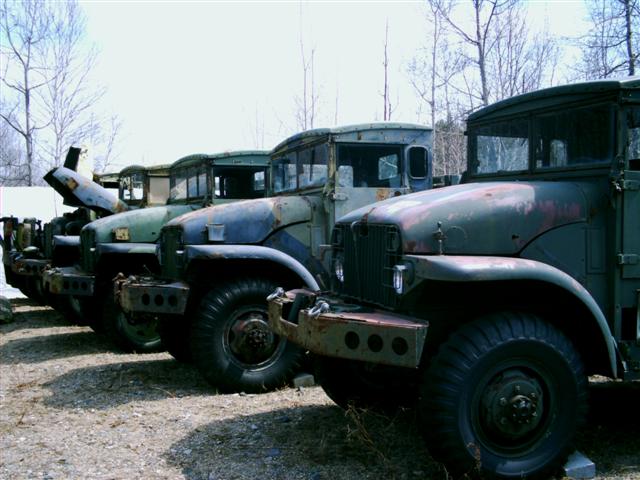
We have built this website for several reasons. The main reason is to preserve the heritage of these vehicles and the memory of the men and women that served our country who spent hundreds if not thousands of hours driving them. Another reason is to help enthusiasts get the information they need to restore their military vehicle or just add that authentic touch its been missing.
The preservation of military vehicles is an important one. More and more these days, governments as well as the military no longer wish to sell military vehicles to the public for concerns of possible liabilies. So the trucks are either being sold as scrap, or not being sold to the public at all. If this trend continues, future generations will no longer be able to see and interact with these pieces of our history, other than in a museum. This is a great shame, as one cannot truely appreciate these vehicles without touching or sitting inside of them to experience what our men and women in uniform went through. Viewing them from behind a ropped off area is not the same. Also by keeping these vehicles in running condition, they can be used in parades and other outdoor activities where most museum pieces are generally not displayed.
You can click on one of the links in the above menu to bring you to a page on a particular vehicle. There you will find information on the vehicle, including what it is, how it was used, technical specifications and pictures. Several of the pages are still a work in progress and have yet to be completed. Information is also being added all the time to the various pages, giving you more information at your fingertips. Also, if you have information to add, please drop us a line and let us know. The more information we can add to the site, the more we can help others.
Come on, don’t let an old soldier down. Get in a army truck and keep the memory alive!
Blog
Read Our Latest News, Updates & More
The Role of an Immigration Lawyer
Whether you are an illegal immigrant or simply planning to settle down in a foreign country, it is important to have an immigration lawyer by your side. The role of immigration lawyer is to advocate for you and help you obtain legal status in the United States. They can also help you get a visa for traveling or a work permit.
Immigration law is constantly changing, which means your lawyer needs to stay current on all new legislation. Your lawyer can also help you with any employment issues or family matters that may arise. This job requires strong communication skills and the ability to explain technical terms to your clients.

Immigration lawyers can work in large law firms, nonprofit organizations, and government agencies. They can also work in small practices, and may even have their own offices. They can be found through law school admissions, alumni offices, and online legal services.
Immigration lawyers often work with immigrants who have suffered human trafficking, torture, or other abuses. They may also work with immigrant families or those who have experienced other kinds of trauma. They can also help immigrants to obtain a legal status in the United States or gain citizenship in India. The work of an immigration lawyer can be difficult, and they often need support and expertise.
Aside from preparing applications and documents, an immigration lawyer can also help you with Student visa renewals and other legal matters. They can also help you prepare for the questions that may arise during an interview. The immigration process is complex and requires a lot of research. A lawyer can help you avoid mistakes by preparing documentation that looks professional. The lawyer may also suggest courses of action based on your specific situation.

A lawyer’s knowledge of immigration law can help you avoid problems, such as having to wait in long lines or being denied. Your lawyer can also help you prepare for any questions that may arise during an interview. They may also make appearances before immigration judges to represent you. In some cases, your lawyer may even act as a mediator between immigration authorities and you.
Immigration law requires a lot of research and attention to detail. In addition, your lawyer must know how to communicate with compassion and understanding. You may also need to make appeals against denials. Your lawyer may also have to correspond with numerous experts and clients.

In addition to helping you with immigration issues, an immigration lawyer may also help you with criminal issues. Your lawyer can help you with getting out of jail, obtaining legal status, or gaining citizenship in India. If you are a criminal lawyer, make sure that you have a thorough understanding of immigration law. A criminal attorney can be sanctioned if they fail to advise a non-citizen client.
Immigration law is one of the most complex legal fields. In order to succeed, your lawyer must understand all aspects of the process. They may need to meet with government officials, make presentations, and prepare correspondence.
How Does Address Verification Software Work?
Are you looking for software to validate addresses from the remote side? If yes, then you have come to the right place. I will discuss further about this topic in this article. Here is the quick and easy way to validate a physical address using the REST interface of an enterprise resource planning (ERP) software:

In the world of enterprise resource planning (ERP), there is one main concept that is used almost anywhere: business intelligence. This concept is about gathering information about your clients and prospects. You can gather this information using a data warehouse. The data warehouse will contain data on all the clients and prospects within your organization. You can access this data from any application on the internet that can make requests to the ERP.
How to Access and Use Address Data?
In the world of ERP, the Remote Site Server is used to access address data from any remote computer. To validate addresses using the Remote Site Server, you need to install a client-side application on a remote computer. This application will perform the required functions, which include data extraction, identification, and validation. When this application is installed, it will return an error if the requested data or address cannot be found on the server. The client-side application will also provide a list of all the fields that are available in the database and what they mean. It will also list the type of fields and the meaning of each one.
If you want to validate the data, you will need to specify a series of rules. These rules will be used to check if the required data is present and match the data that you entered on the form. In addition to these rules, you should also validate the format of date and time. This rule is commonly known as the verification of format. When you validate the date and time, you can ensure proper data formatting and correct time.
Another factor that should be considered is the data source. This refers to a group of computers that are linked to the company’s servers. Each of these computers should be able to receive and send data. Some companies use dedicated servers for this purpose. On the other hand, some companies choose to outsource their address data collection.
The next step is to analyze the data source. You should find out what information you want to store in your database. The information can include phone numbers, addresses, email addresses and names. Once you determine the data source and the rules to validate the data, you can set up the application to retrieve data and run them through the software. This will save you time when it comes to indexing your data and retrieving the information when you need it.
Conclusion
In order to use this software to validate addresses realtime, you must have access to a network. The software will work offline and online. Offline, the software can access the data you feed it through a phone number or an email address. Online, you can access the data from any computer with an Internet connection. Once you have the software running, you can feed it any number of address forms, and the software will store and return all relevant information.
This software to validate addresses realtime allows companies and individuals to avoid errors that come from manually inputting data. This helps the company or individual to run their business more efficiently, while also reducing waste of money and time. Using address validation using REST API allows you to create data-rich web pages quickly and easily. You can also save time and money by eliminating the need to manually input data, saving you time and money.
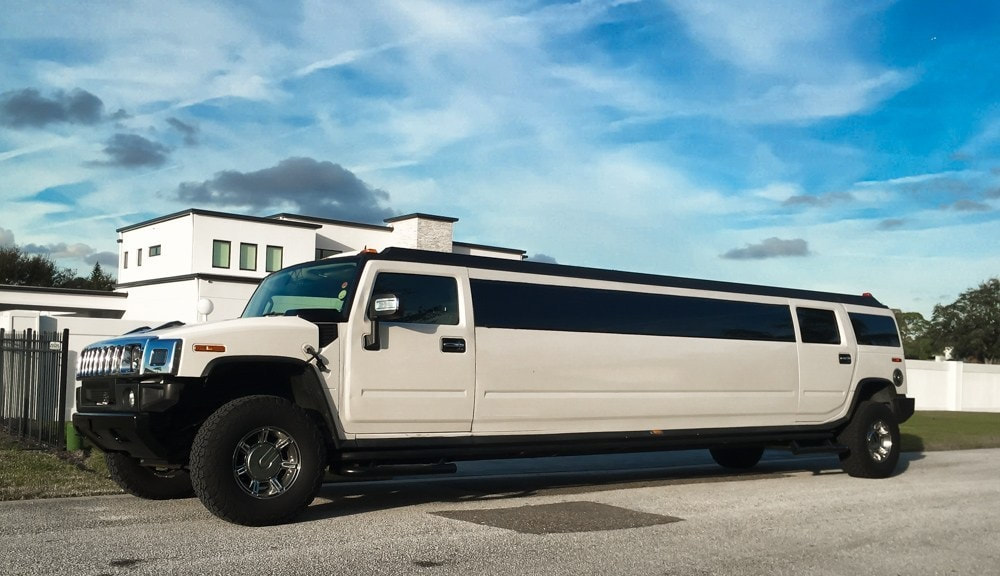
Get A Clear Picture About The Perks Related To A Luxury Limousine
When you are opting for a luxury limousine, you hope for a par level of hospitality and features. The limousine is the second name for lavishness and luxury. Luxury can be provided by numerous amenities and technologies inside a mobile wagon that provides a unique experience on any occasion.
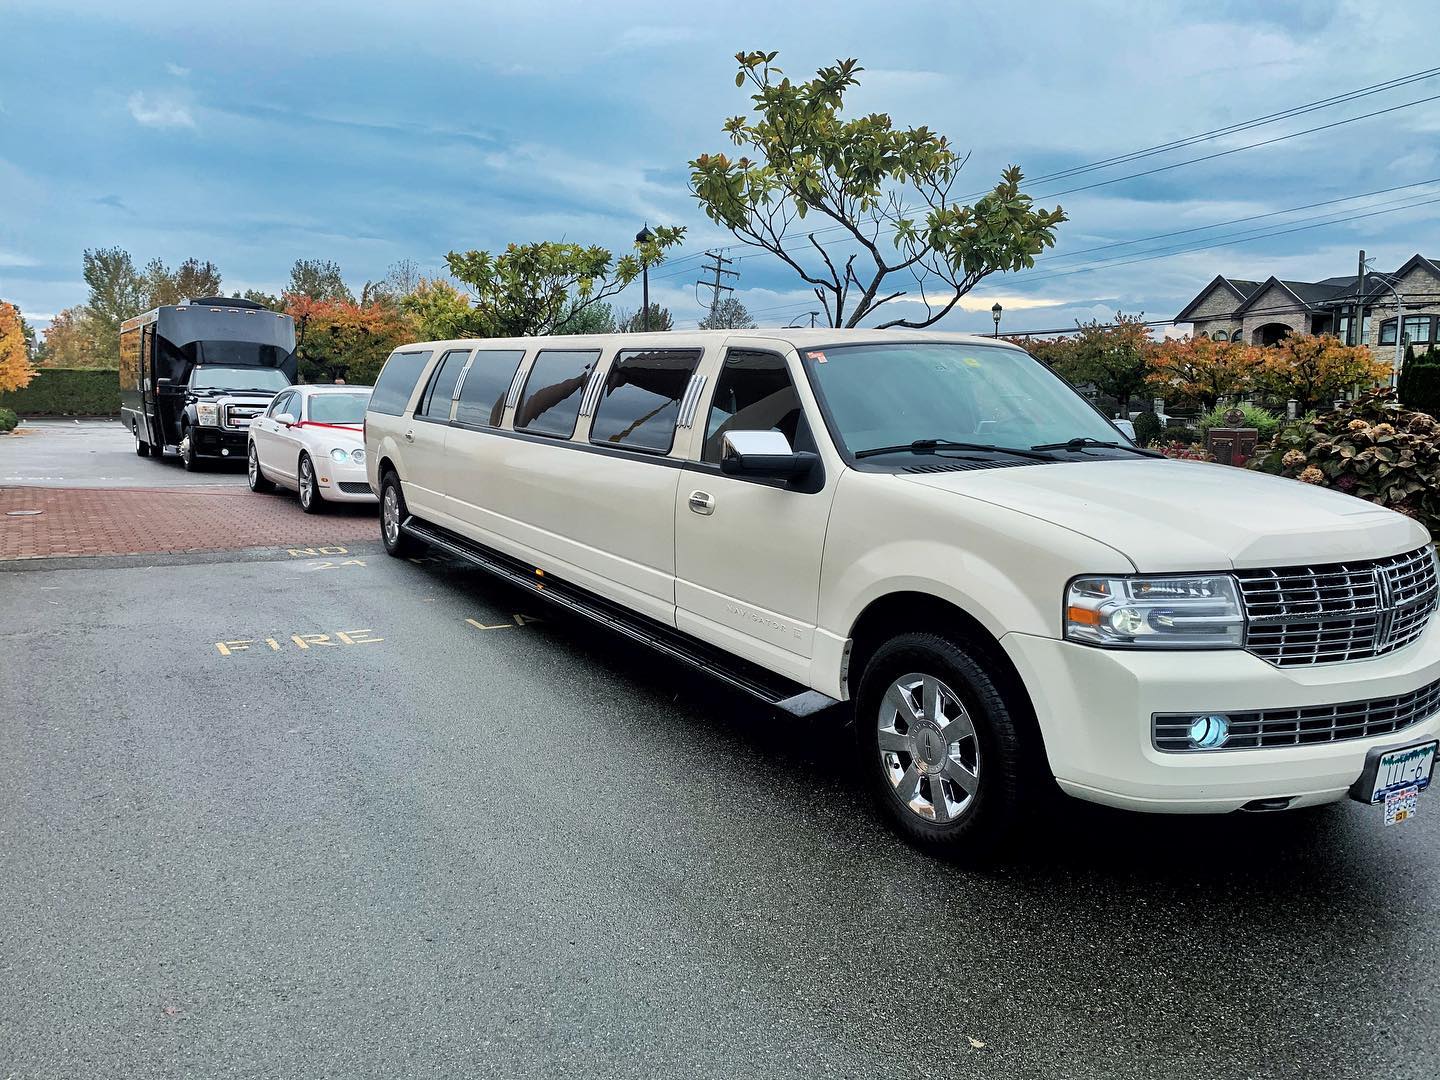
In this article, we are going to grasp some of the core advantages of a rental luxury limousine. Following are some of the advantages of using limousines:
Vividity
The luxury limousine is not a single entity. These vehicles are fabricated by many companies with different types of characteristics and other accessories. Depending on the need of the customer, there are different models of stretch limos which can accommodate more than 20 passengers. The vehicles consist of large boot space, which has a massive luggage space capability. The interior also varies from different models; some of them comes with posh furnishing and comfort, which fulfills the need of customers. You can either travel to a posh event or a bachelor’s party.
 Technological gains
You can attain an exciting experience which makes the whole journey an interesting one. These luxury limousines are equipped with LCD screens, internet connectivity, DVD players and state-of-the-art music equipment (speakers, amplifiers, etc.). The electronics and gadgets provided in the luxury limousines are very technology-oriented. The people who invest money in lavish and luxurious limousines always look for technology-based advancement. A limousine service provider gives you an ample variety of limo designs to choose from.
Multi-cuisine refreshments
The refreshments provided in this luxurious mobile wagon keeps a very important place. If you have a booking for a long journey, then it will need ample refreshments throughout the journey. Without refreshments, there is a low possibility of attaining satisfactory service. These limousines are equipped with wet bars and also a compact kit for eatables. You can get a wide range of beverages and refreshments which provides maximum delicacies.
Cozy environment
The luxury limousine is a suitable choice for attaining a cozy environment. If you are booking it on a regular high or low-temperature weather, then this luxury limousine provides high-quality air-conditioning and climate control systems. The luxury limo maintains the poise of attaining different facilities. This can enable the customer to overcome the difficulties related to excessive heat or cold. A limousine service in Toronto gives high levels of luxury and a comfortable environment for their customers.
Safety concerns
The ultimate perk of this luxury limousine is the safety features. The chauffeur you get in the luxury limos are well trained. The facilities which are provided by these luxurious rides are technologically sound. For example, Adaptive cruise control, blind-spot monitoring, lane-keep assist and pre-collision braking are all common in newer limousine models ar the recent upliftment in the technology. Reaching your destinations without any hassles is preferable by any customer who opts for that.
The luxurious limos are par level of service automobiles. This makes the customers enjoy it at its best. You just have to make yourself acquainted with the different clauses and facilities provided. The advantages will make you crave for the ride once again. Just book your first luxury ride and get a unique experience. you can get a luxurious journey by booking your limousine services.

Women Really Love Limousines
The studies have proved that there are many limousine services that are carried out by the business owners. However, they are especially available in Toronto, Canada. It has also proved that the women are sure in love with the limousine and many other things at night. They prefer this to the events and the services that they are moving to. The love for limousine by women is influenced because in the big cities there is Limousine Service in Toronto. Most women will consider it the most fashionable thing by having a ride on a limousine ride. This is the best in having in the remote areas.

Moreover, the love for this luxury is determined by the flat rate charges which the service providers are charging. With this, women get an expensive experience. The length is not the only factor that determines one’s love for a limo. Since there a lot of vehicles that are smaller in size but are maintaining prestige in the market but none of these can match the popularity of the limousine. Not to mention but the service operators of limousine are available for your help all the time and that’s also a major factor of why women like it the most. Even a single minute in this prestigious vehicle will make women fall in love with it.
Yet another reason for this vehicle to get loved by women is the occasion at which it comes to use. It certainly fits the bill for a wedding or a party or even a performance show. When you drive it you will grab the attention of everyone around you. Just imagine that you give a ride of limousine to your wife on the day of the wedding. This will be a memorable experience for her that she will never forget in her entire life and pondering it for a lifetime. The reason for such an experience is because of the psychological fact that women love to be treated in a different way that looks much better than the others. And limousine provides just the same thing. Talk about a perfect match.

Even if you take your women at a dinner party in a limousine chance are there that you women will feel very blessed and will appreciate the fact that you gave her a ride in a limousine. However, you can have a limousine service in Toronto. This is the best for having and experiencing the pleasure of having the ride in a limo. On the other hand, you can enjoy these from the services that are provided by the company. When you are visiting a celebrity performance then you can move to the event in a limousine. This is the best way through which people are blessed and feel happier in moving in a limo. No matter you are young or old there are women and ladies passionate about having a ride in a limousine.
However, at last, you must have the services that are provided in Toronto, Canada. Thus, have the ride in the limousine when you are moving for a function.
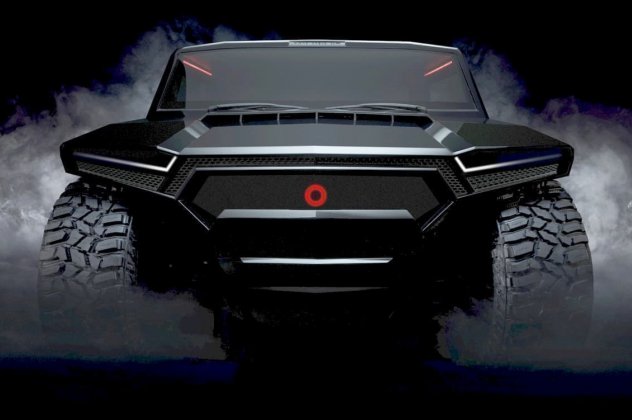
Know more about the bulletproof car for sale!
Disregard the reinforced Jeep, there’s another crazy SUV around the local area—and we can’t quit taking a gander at it. The Ramsmobile RM-X2 utility vehicle, which appeared at Frankfurt Motor Show not long ago, is so absurd that it’ll shield you from gunfire and after that help, you unwind with a hookah.
The RM-X2 is a “multipurpose hypercar” that its producer guarantees can do everything, including withstanding shots and buoy, reports CNET. The Belarus-based organization is so positive about their tank-like vehicle they guarantee it can handle the hardest and most perilous of landscapes around, including those where individuals are “not intended to be.” You can Check out the bulletproof cars for sale.
This New 90-Foot Mini-Superyacht Cuts Through Shallow Waters With Ease

The SUV will be accessible in four variations. There will be a stripped-down Ascetic model, the Devil’s Trim, which the organization cases will consolidate “extravagance and murkiness” and “innovation and otherworldliness.” There’s likewise the similarly blustering God Creation and the range-besting Ramsider. It gives the idea that the last two alternatives won’t be out until one year from now, so their full specs are as yet obscure. You can’t surge a God Creation, clearly.
Notwithstanding the four models of bulletproof cars for sale, there are likewise two drive-trains to browse, one of which offers an amazing 999 hp, however, it’s indistinct which one does. The first is the equivalent 6.2-liter LT5 V8 gas motor utilized in the C7 Corvette ZR1, while the other choice is the 6.6-liter Duramax diesel V8 ordinarily just utilized in hardcore trucks. The spec sheet for the vehicle indicates a type of module half breed framework being utilized too. While top speed isn’t offered for the RM-X2, the organization claims it can quicken from 0-62 in simply 3.3 seconds, a not in the slightest degree pitiful figure for such a rough-looking vehicle.
Ramsmobile RM-X2

The RM-X2 highlights an ultra-light carbon fiber body that enables the base-level Ascetic to weigh in at a measly 3,300 lbs, but at the same time is intense enough to withstand “overthrow endeavors.” It additionally incorporates back pivoted scissor entryways, 20-to 24-inch wheels, a neon light-complemented inside, a Teflon-covered underside and a fumes Ramsmobile is taking a shot at transforming into a fly impetus framework. Additional items incorporate B6 or B7 levels of impenetrable insurance and a “Smoker’s Package” that will see the vehicle equipped with various electronic hookahs that “enable you to control the smoking force, yet additionally to cool the smoke to the ideal temperature, and spare smoking parameters in your own record.”
The RM-X2 accompanies a beginning cost to coordinate its pull, $999,999. In any case, the organization revealed to CNET that an apparently full-included variant will be accessible for $3,000,000 later on. Ramsmobile likewise plans to reveal another SUV named the Cerebus, which the organization is as of now alluding to as the Guardian of Souls, due to course. That SUV will be out in 2022. We will hold up eagerly.